I’m Here To Assist You
Licata Building System needs your contact information to contact you about our products and services. Our specification manager will contact you shortly in regard to your enquiry.
Authentic brick finishes. Lightweight, durable, and ideal for modern construction.
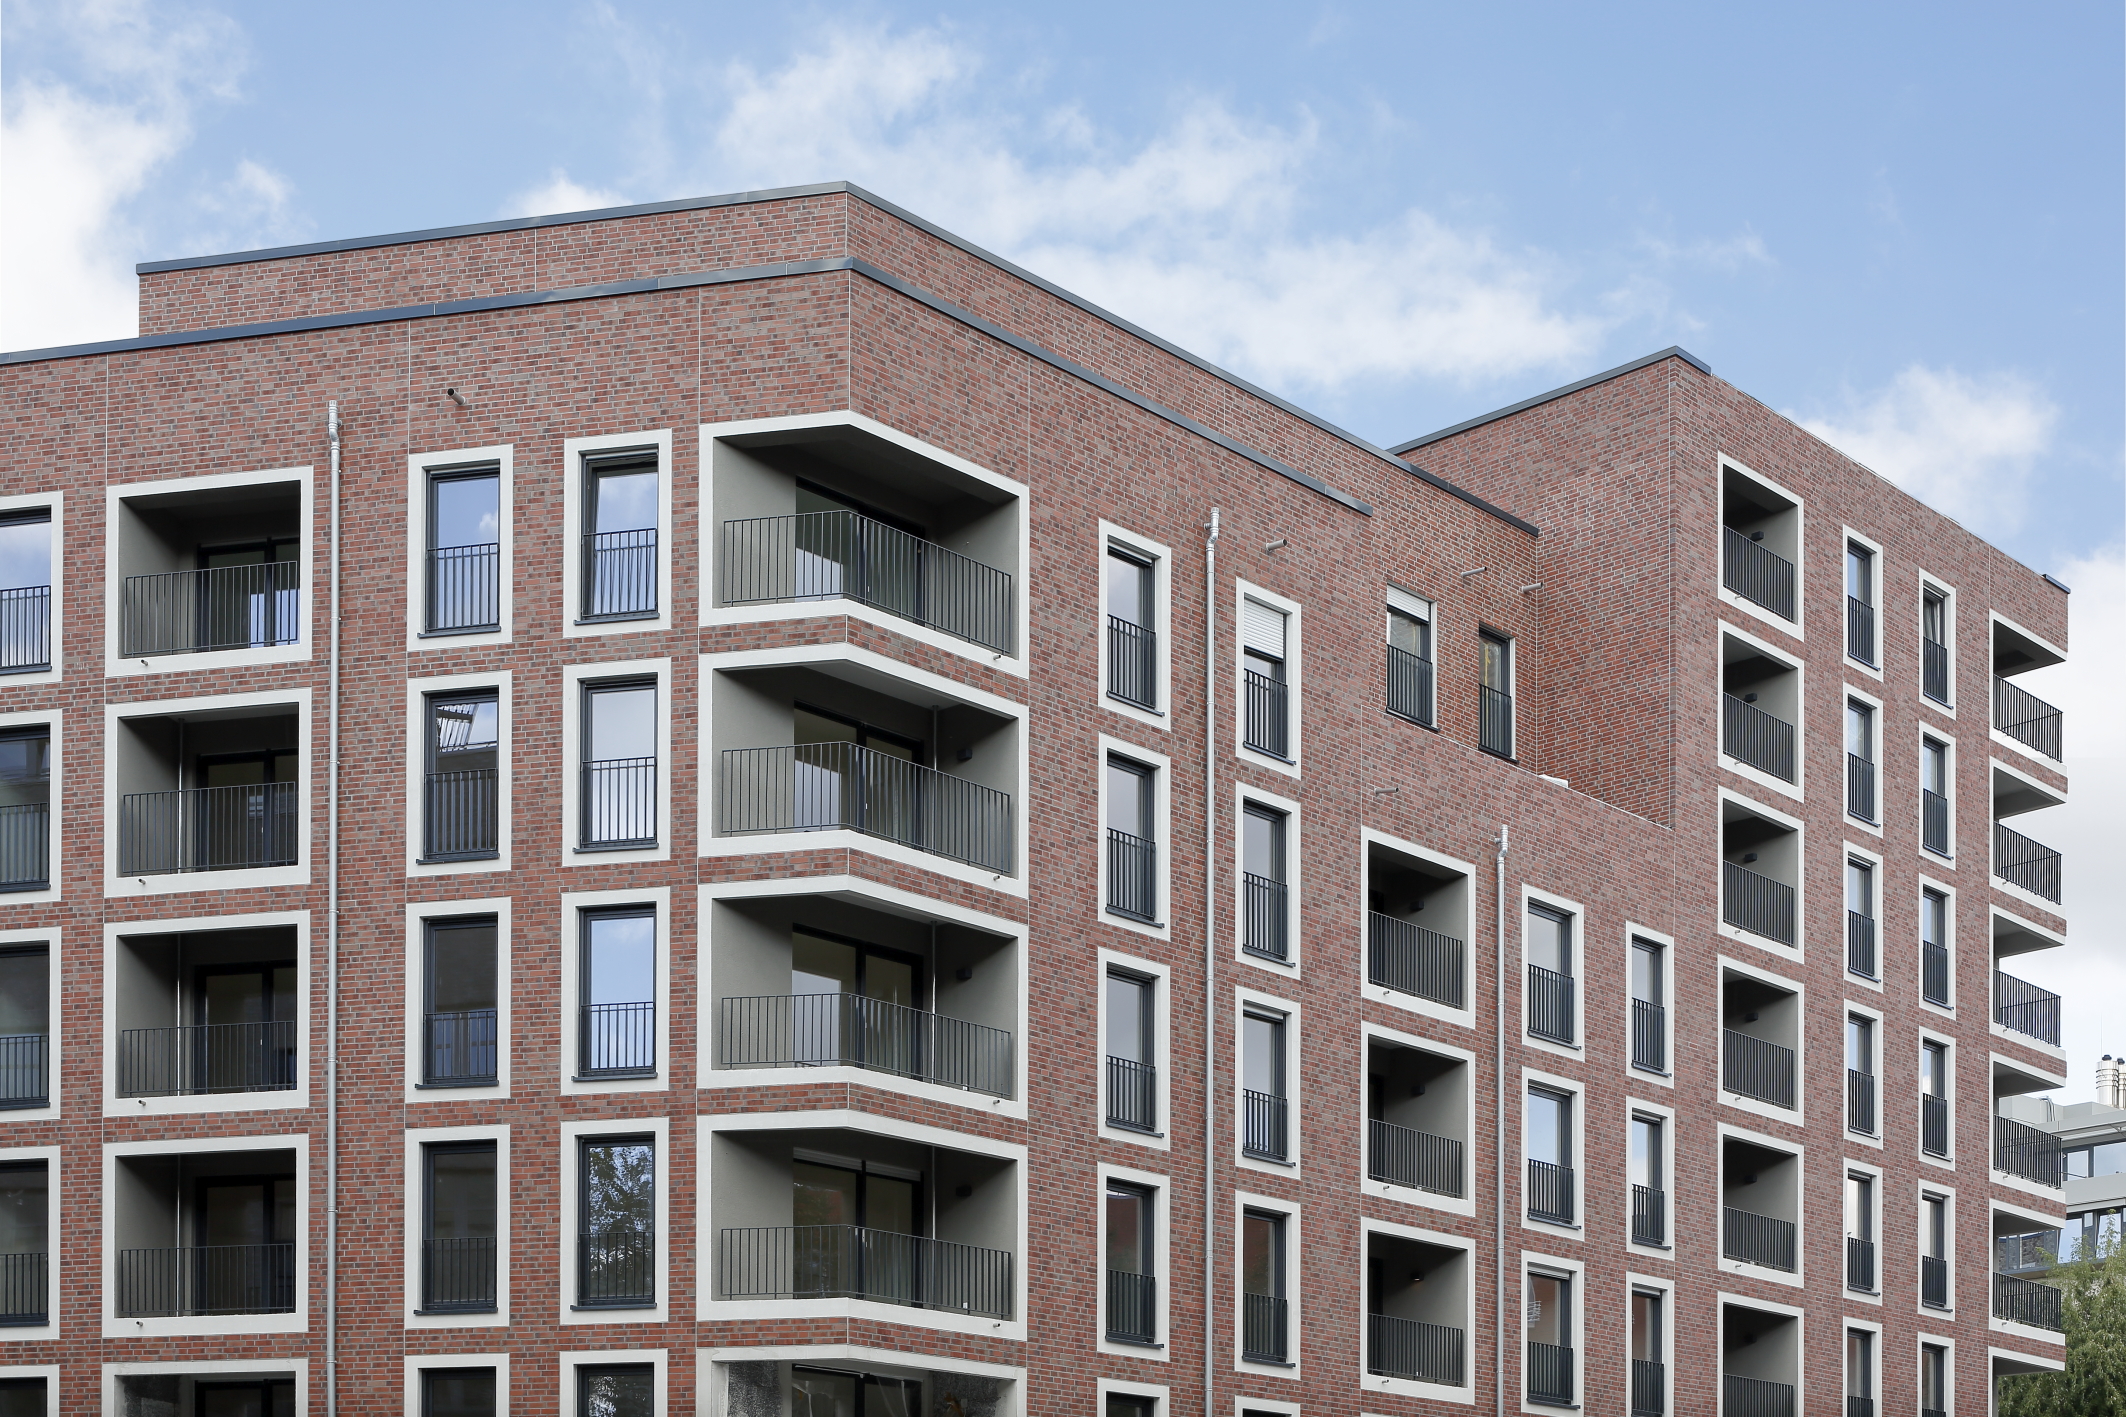
The Authentic Brick Look - Without the Weight
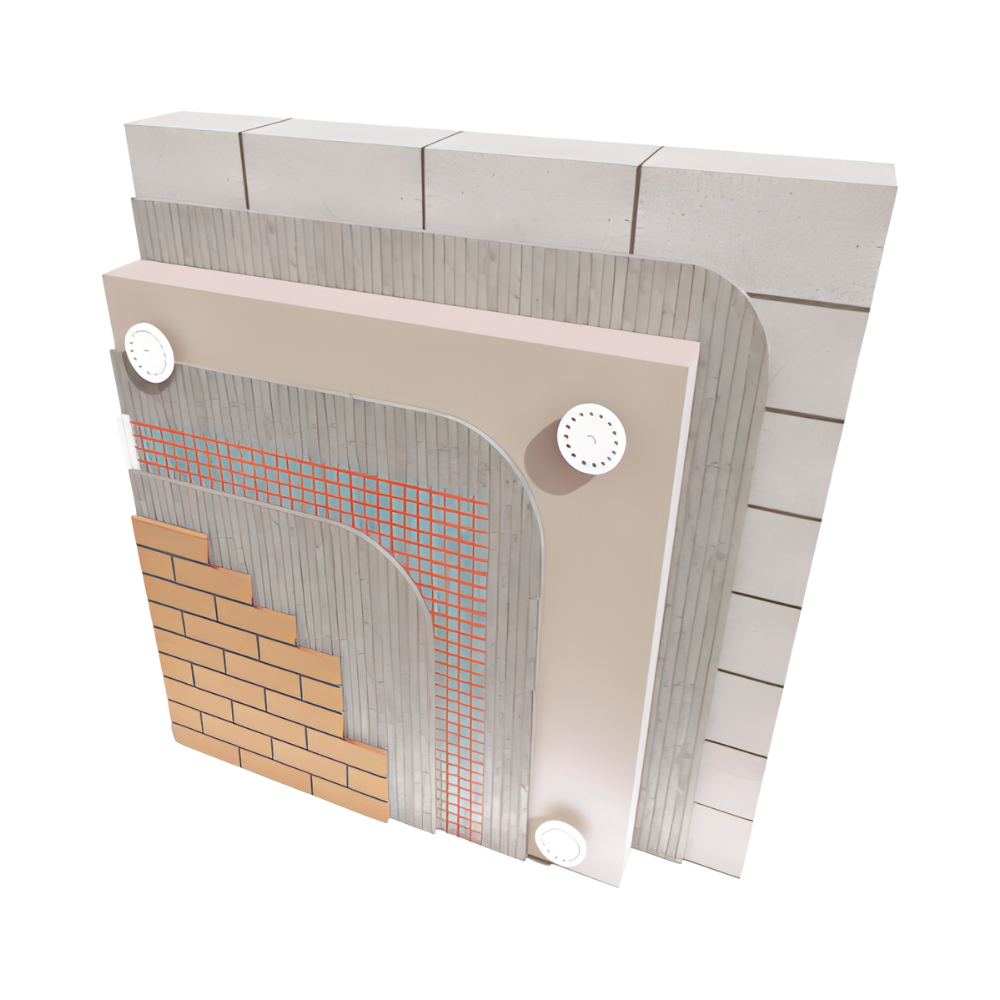
Achieve traditional brickwork aesthetics with the flexibility and performance of a modern façade solution. Licata’s real clay brick slips are lightweight, durable, and compatible with a wide range of substrates — from insulation boards to render carrier boards and solid masonry.
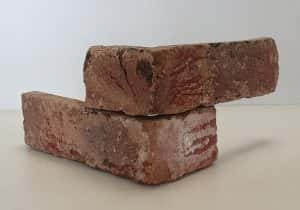
Licata Clay Brick Slips combine genuine kiln-fired clay with cutting-edge façade systems to deliver the timeless beauty of brick without the bulk and limitations of traditional masonry. Ideal for both new build and retrofit projects, our brick slips are available in over 30 colours and finishes, offering unmatched design flexibility for architects and specifiers.
Whether you're working on a timber frame, modular build, high-rise EWI system, or solid wall renovation, Licata’s complete brick slip systems provide the aesthetic finish of real brick with streamlined installation and certified performance.
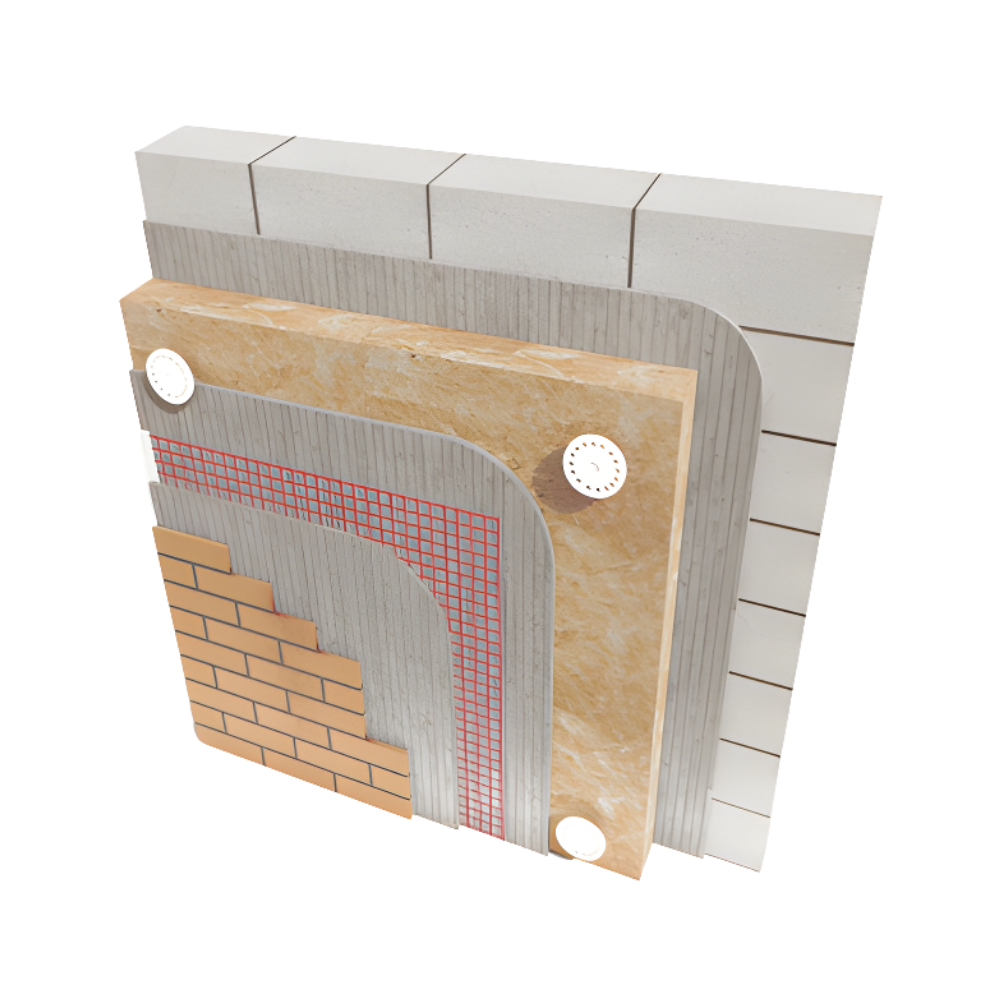
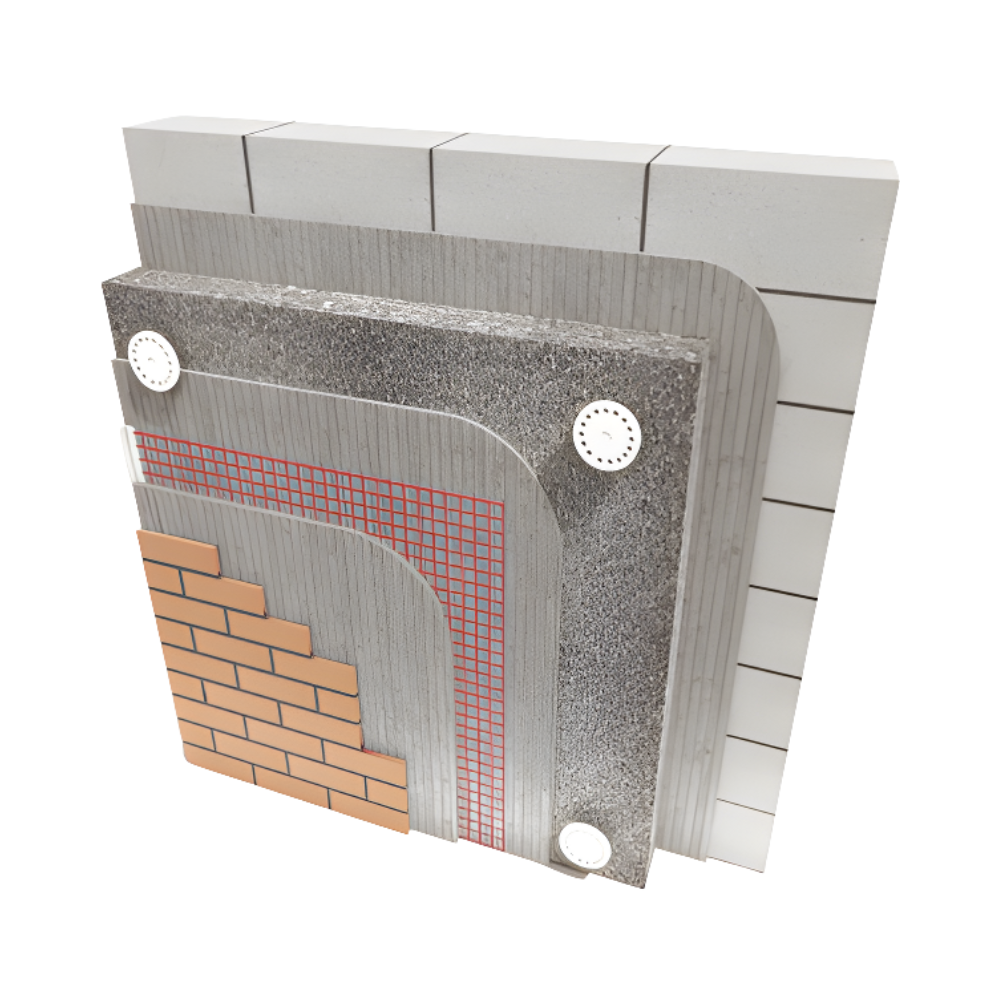
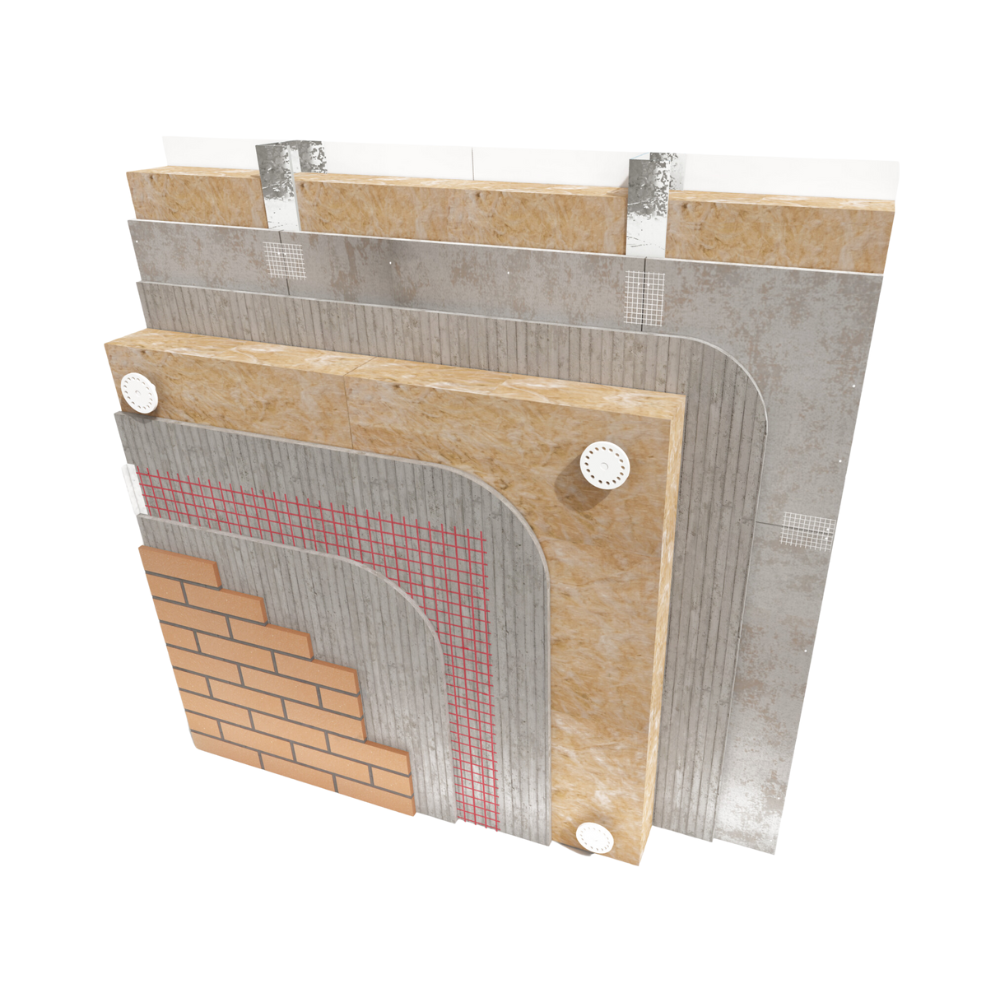
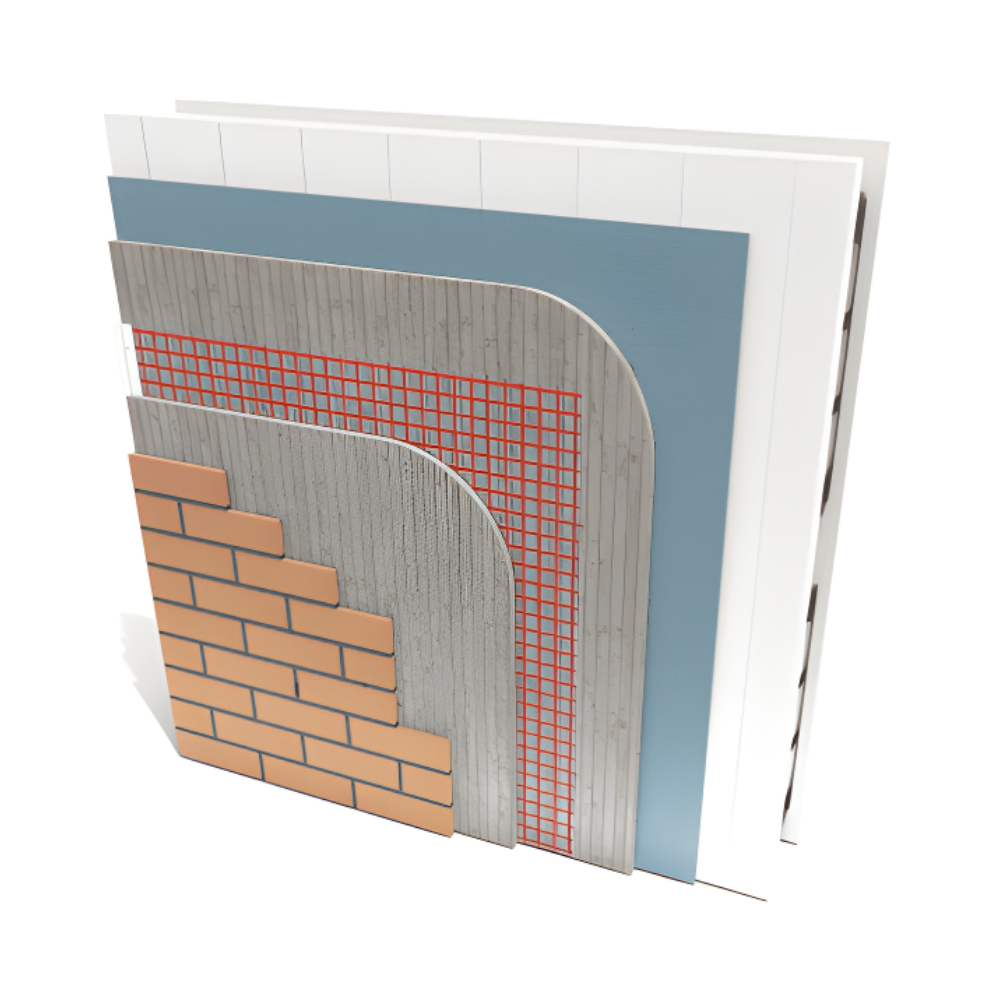
Licata clay slips are a versatile thin brick cladding that simulates the look of traditional clay brickwork whilst providing greater insulation and more flexibility of style and application. Our clay slips come in a range of sizes, colours and textures, and are suitable for both internal and external use. Providing modern insulation and greater adaptability whilst giving you that traditional brickwork look that is so popular in the UK. Suitable for both low and high rise buildings, this is an A2 fire classification brick slip system in accordance with BS EN 13501-1 : 2007.
Whether you're working on a timber frame, modular build, high-rise EWI system, or solid wall renovation, Licata’s complete brick slip systems provide the aesthetic finish of real brick with streamlined installation and certified performance.
Features
- Fully accredited to the A2-s1, d0 fire safety standard.
- Three manufacturing processes to expand the choice of texture, colour and finish.
- Suitable for new and existing buildings, including high-rise.
- Freedom in pattern design.
- Standard formats and corner solutions are available.
Clay Brick Slips Colour Range
Our clay brick slips are available in a wide variety of colours and finishes to suit both traditional and contemporary designs. To see the complete selection and find the perfect match for your project, browse our full Clay Brick Slips Brochure.

Leading Italian
Manufacturer

BBA Certified
Insulated Systems

Licata 10 Years
Product Warranty

National
Insulation
Association
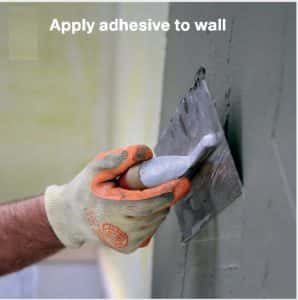
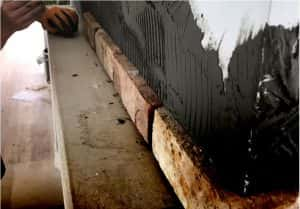
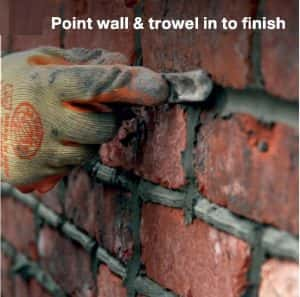
Please check the brick slips before installing. The substrate should be clean, dust free, workable, solid and even. Any wallpaper or other residues should be removed before installing the brick slips. We recommend priming the substrate. Spread a suitable flexible adhesive with a toothed spreader by “buttering” both on the back of the slip and on the wall (“buttering-floating”). A string line will be helpful.
Yes, clay brick slips offer the same authentic brick finish as traditional external brick walls, without the extra weight, depth, or structural demands. They’re made from real clay bricks and installed directly onto a prepared substrate, making them a practical choice for both new builds and retrofits.
Our systems are fully tested for durability and weather performance, ensuring they work just as well as a standard external brick surface. You get the same look and texture of traditional brickwork, with the added benefit of easier installation and improved compatibility with insulation and facade systems.
When installed using the correct adhesive, substrate and system, Licata’s clay brick slips are built to last for decades. These are manufactured through kiln firing, giving them excellent resistance to weather, external conditions and long-term surface wear.
Our brick slips won’t warp, fade or degrade like other materials, and can be applied externally or internally to suit your design goals. With the right installation method and regular inspection of joints, these slips continue to deliver high quality and performance for the lifetime of your project.
Absolutely. We’ve developed complete systems that integrate clay brick slips with a variety of EWI boards, including EPS, mineral wool, phenolic and cement-based substrates. This allows you to achieve a traditional brickwork look while meeting thermal and fire performance requirements.
Our brick slips have been installed on modular homes, ICF, timber frames, and solid wall retrofits. They’re ideal for creating an authentic brick finish where insulation and cladding need to work together as part of a high-performing building system.
Clay brick slips are cut from real clay bricks, giving them the appearance of full bricks without the weight or structural demand. They’re much lighter, easier to install, and suitable for buildings where full brick layers aren’t practical due to load or space constraints.
While full bricks require deeper foundations and longer build times, our brick slips deliver the same look, with greater ease of use and design flexibility. You can create detailed patterns, corner returns and brick tile designs that blend with existing brick finishes perfectly.
Yes. All Licata clay brick slips are tested to A2-s1, d0 fire classification under BS EN 13501-1 : 2007, making them suitable for high-rise and external applications where fire safety is critical. They can be applied to walls in both domestic and commercial buildings.
These systems are also widely specified by architects due to their compliance with UK building regulations. When paired with the correct insulation board and adhesive, our complete brick slip system ensures fire performance is not compromised during or after installation.
Contact our sales and technical team for advice and information on our systems and products.
![]()
![]() Unit 6, Hampton Business Park Bolney Way, Twickenham TW13 6DB
Unit 6, Hampton Business Park Bolney Way, Twickenham TW13 6DB
![]()
![]() Monday - Friday: 7am - 5pm Saturday: 8am - 12pm
Monday - Friday: 7am - 5pm Saturday: 8am - 12pm
![]()
![]() Unit 5, Brunswick Industrial Park London, N11 1JL
Unit 5, Brunswick Industrial Park London, N11 1JL
![]()
![]() Monday - Friday: 7am - 5pm Saturday: 8am - 12pm
Monday - Friday: 7am - 5pm Saturday: 8am - 12pm
![]()
![]() Unit 4, Schooner Park Schooner Court, Dartford DA2 6NW
Unit 4, Schooner Park Schooner Court, Dartford DA2 6NW
![]()
![]() Monday - Friday: 7am - 5pm Saturday: 8am - 12pm
Monday - Friday: 7am - 5pm Saturday: 8am - 12pm
![]()
![]() Unit 17 Frankley Industrial Estate, Frogmill Rd, Rubery, Birmingham B45 0LD
Unit 17 Frankley Industrial Estate, Frogmill Rd, Rubery, Birmingham B45 0LD
![]()
![]() Monday - Friday: 7am - 5pm Saturday: 8am - 12pm
Monday - Friday: 7am - 5pm Saturday: 8am - 12pm
![]()
![]() Unit 6C Stanley Green Trading Estate, Stanley Road, Cheadle Hulme, SK8 6RB
Unit 6C Stanley Green Trading Estate, Stanley Road, Cheadle Hulme, SK8 6RB
![]()
![]() Monday - Friday: 7am - 5pm Saturday: 8am - 12pm
Monday - Friday: 7am - 5pm Saturday: 8am - 12pm
![]()
![]() Shades House, Hodgson Way, Wickford, Essex, SS11 8yd
Shades House, Hodgson Way, Wickford, Essex, SS11 8yd
![]()
![]() Opening Soon
Opening Soon